📊 IRIS Dataset Details
Step 0 · OverviewFeatures: SepalLength, SepalWidth, PetalLength, PetalWidth | Label: Species (Setosa, Versicolor, Virginica)
🎯 Objective: Classify iris species based on morphological measurements. This is a classic multi-class classification problem.
🗂️ 1. Data Management Tab
Load CSV & Target Selection📌 Steps: Click "Load Tabular Data" → choose IRIS.csv. After loading, dataset information will appear. Select column Species from Target Selection. Neural Network Designer automatically detects classification problem (3 classes).
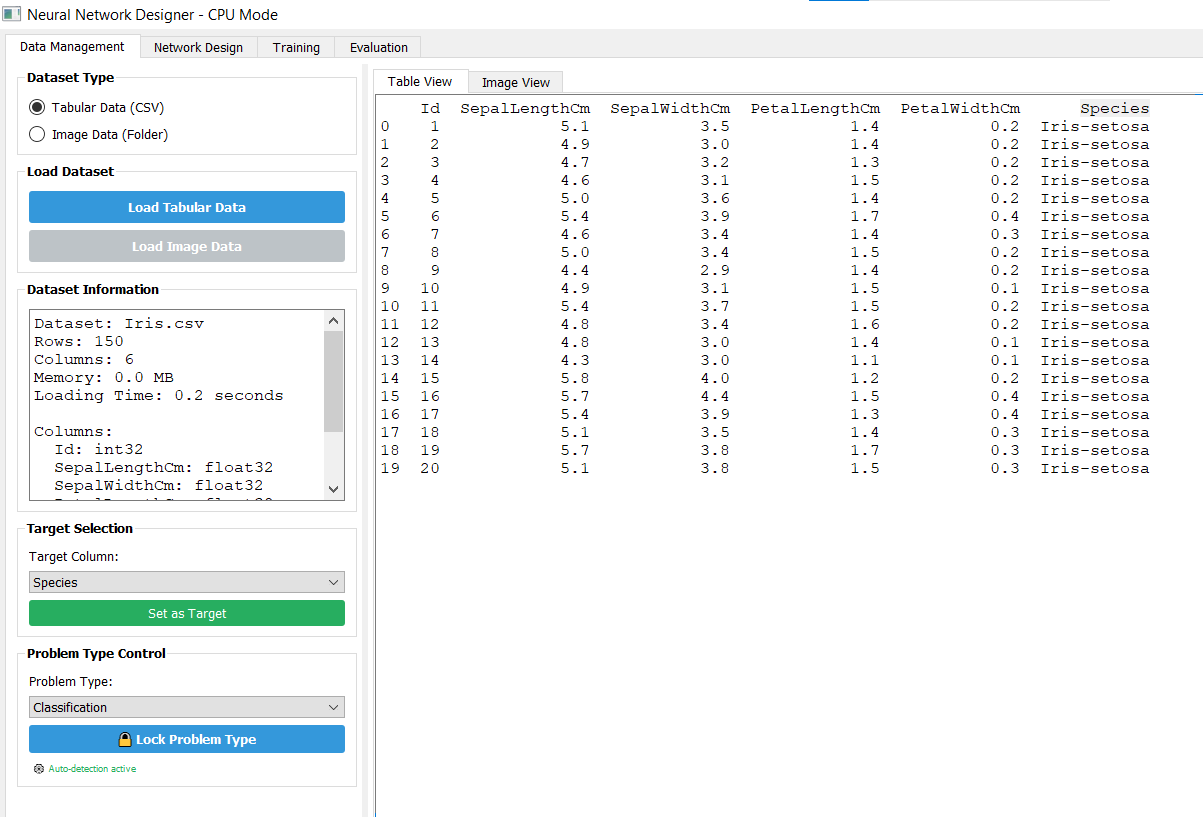
Target: Species (multiclass). Auto-detection active.
🧠 2. Network Design Tab
Auto-Design & ArchitectureSwitch to Network Design → Click Auto-Design → choose desired template (e.g., dense network). Click "Apply preset". Visual model appears: Input → Dense(32, relu) → Output(softmax, 3 units).
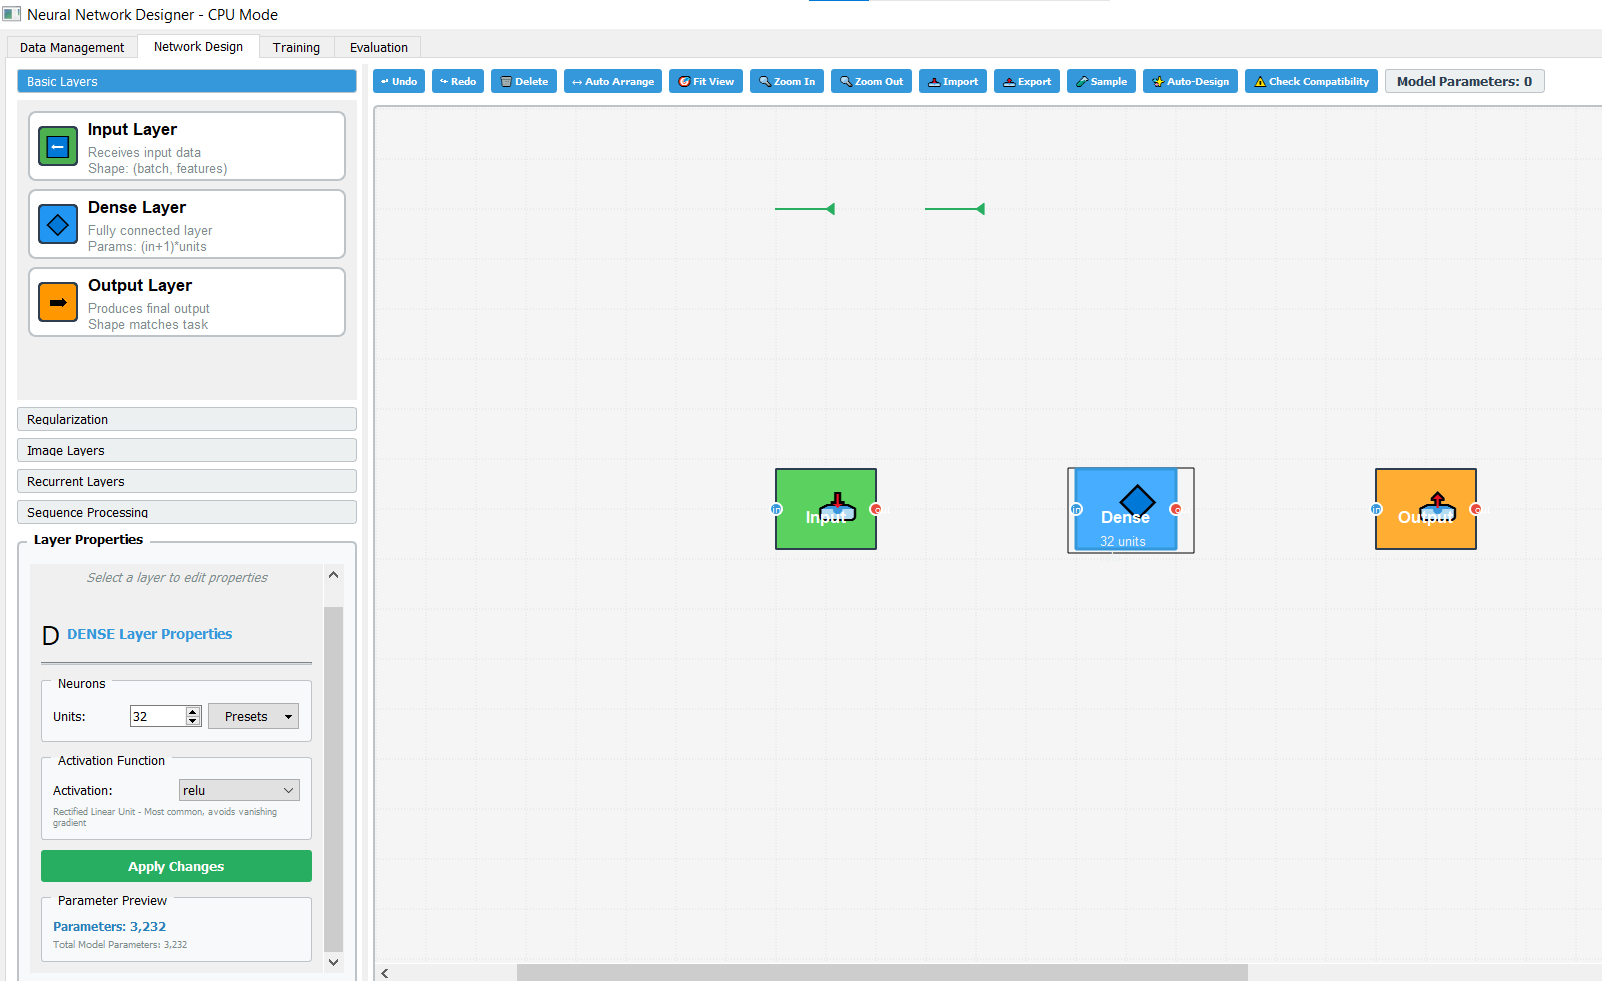
✔ Dense Layer: 32 neurons, ReLU activation
✔ Output: 3 classes (softmax)
Total Parameters: 3,232
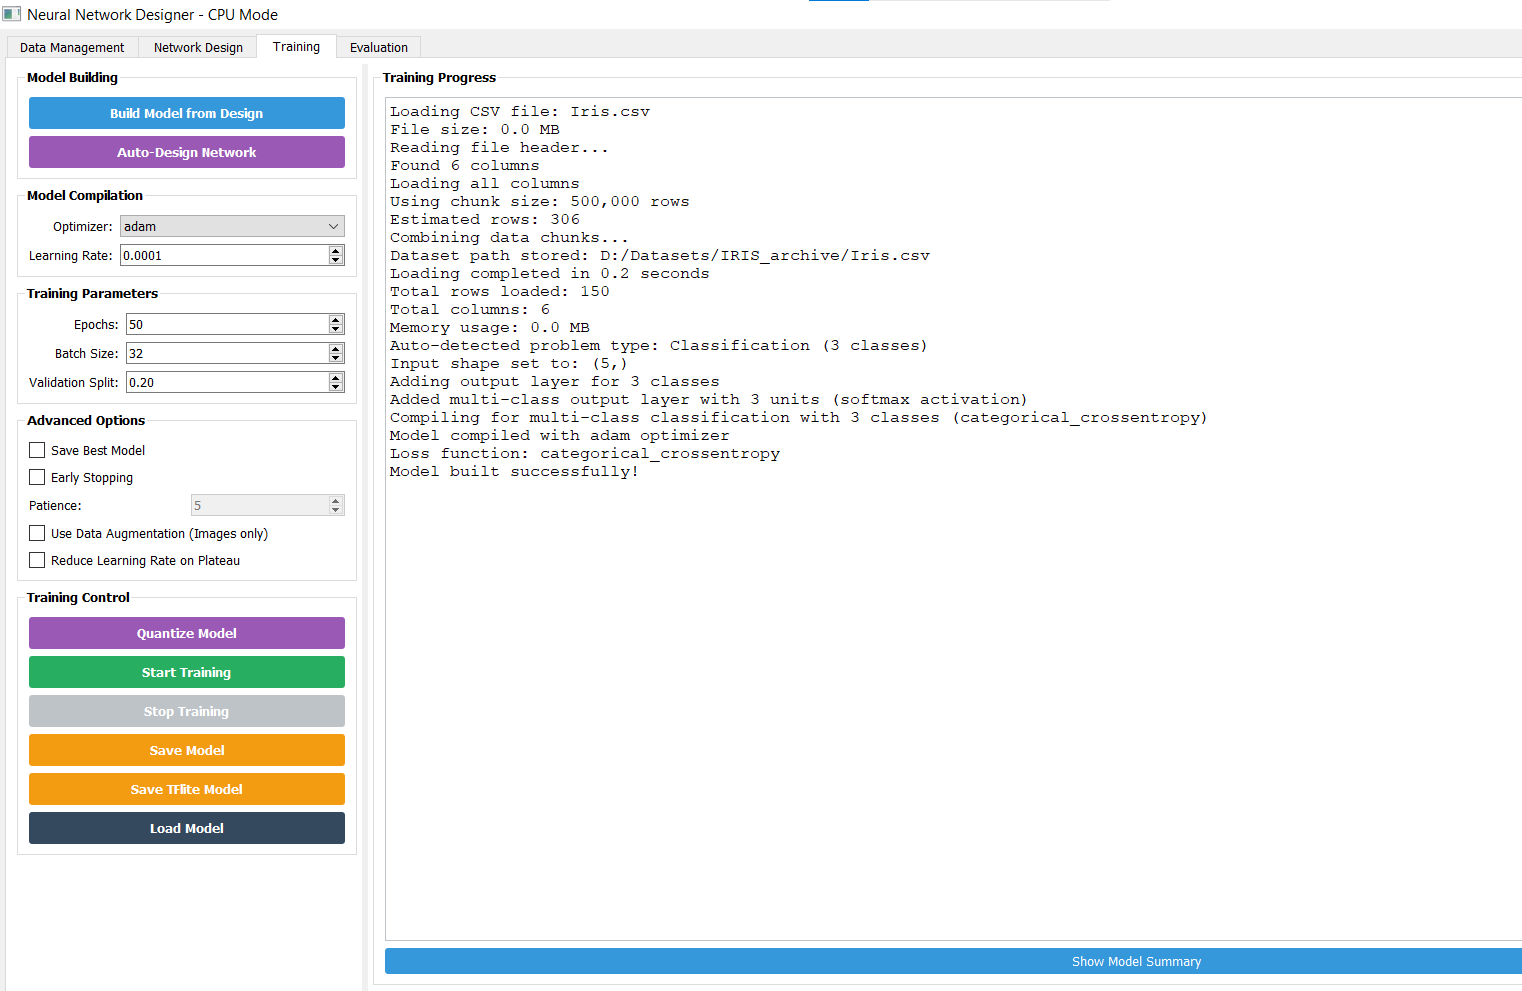
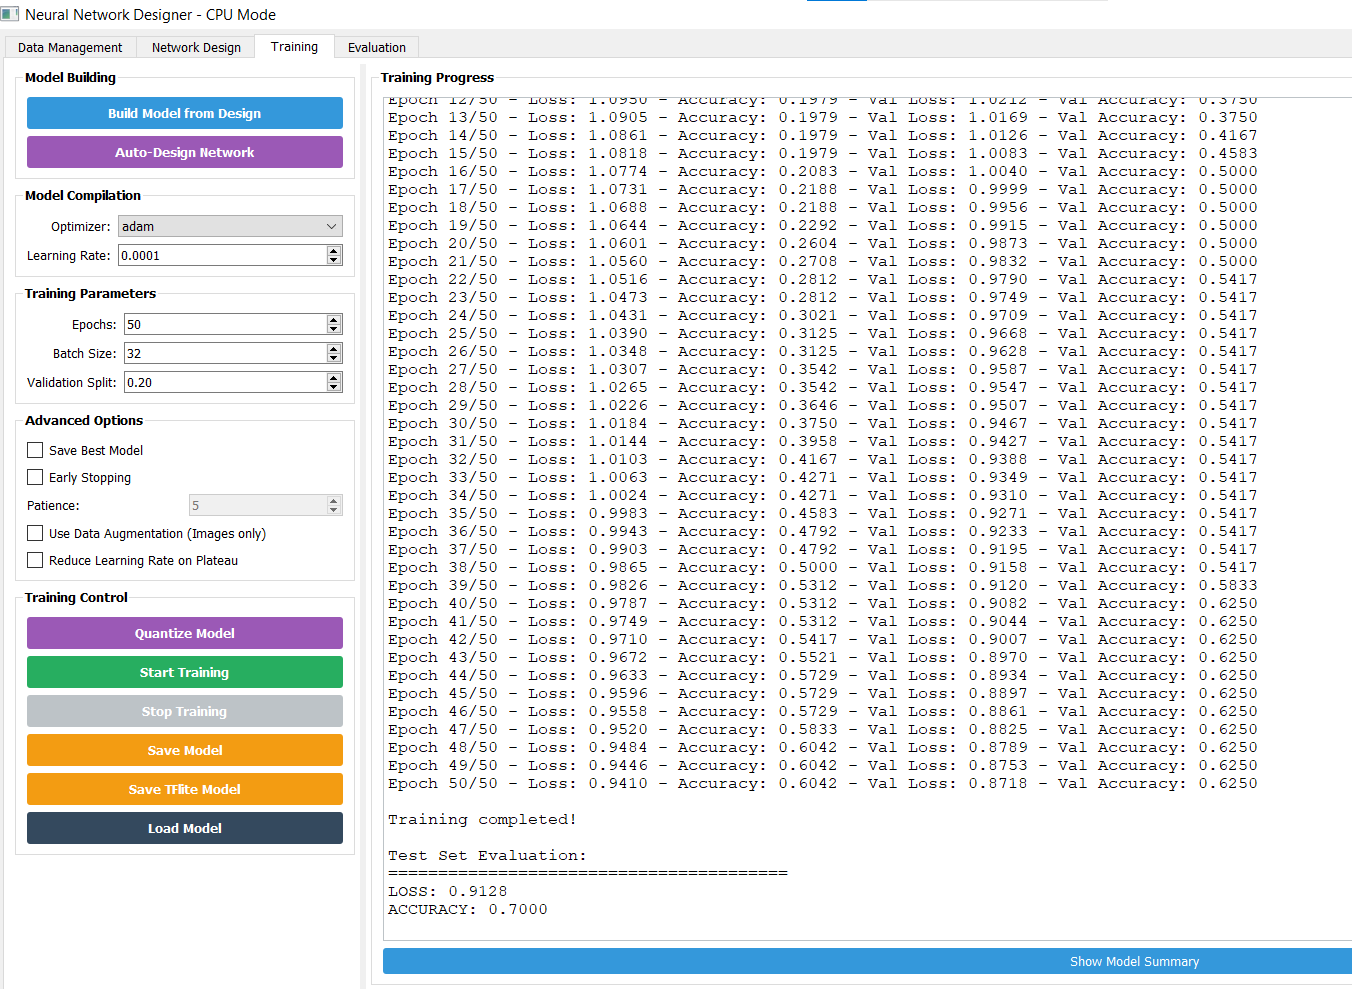
🚀 3. Training Tab — Build & Train Model
Compile & Start Training⚙️ Model Compilation: Optimizer: adam | Learning Rate: 0.0001 | Loss: categorical_crossentropy
Training Parameters: Epochs: 50 | Batch Size: 32 | Validation Split: 0.20 | Early Stopping (patience=5)
📈 4. Evaluation & Metrics
Model PerformanceClick "Evaluate Model" to get evaluation results. Use "Plot Metrics" to visualize training vs validation loss/accuracy.
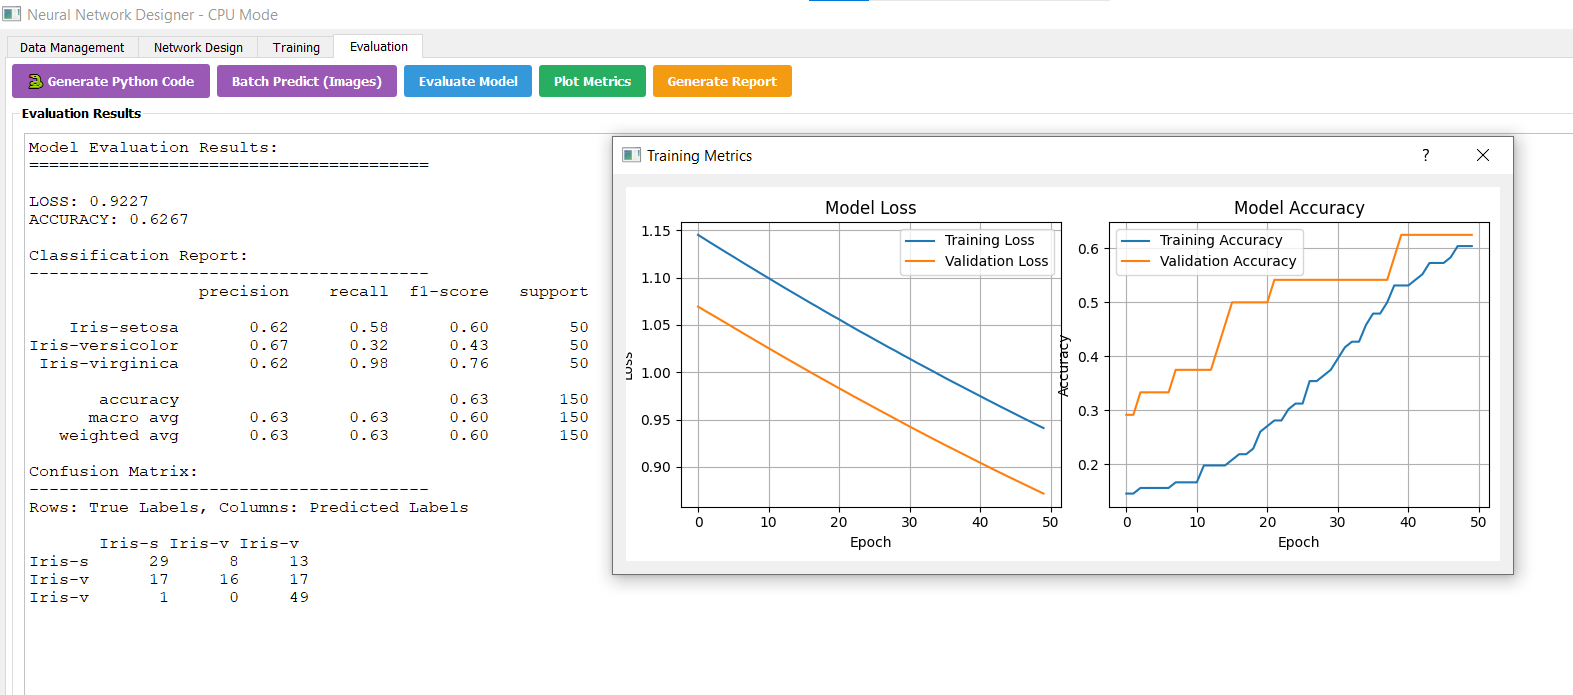
| Class | precision | recall | f1-score | support |
|---|---|---|---|---|
| Iris-setosa | 0.62 | 0.58 | 0.60 | 50 |
| Iris-versicolor | 0.67 | 0.32 | 0.43 | 50 |
| Iris-virginica | 0.62 | 0.98 | 0.76 | 50 |
| accuracy | 0.63 | |||
| macro avg | 0.63 | 0.63 | 0.60 | 150 |
        Iris-s  Iris-vc  Iris-vg
Iris-s     29       13       8
Iris-vc    17       16      17
Iris-vg     1        0      49
🐍 5. Generate Python Code — Continue in Python Ecosystem
Export & DeployClick "Generate Python Code" → Copy the ready-to-use script. This code uses TensorFlow/Keras, scikit-learn preprocessing, and reproduces the model architecture designed in Neural Network Designer.
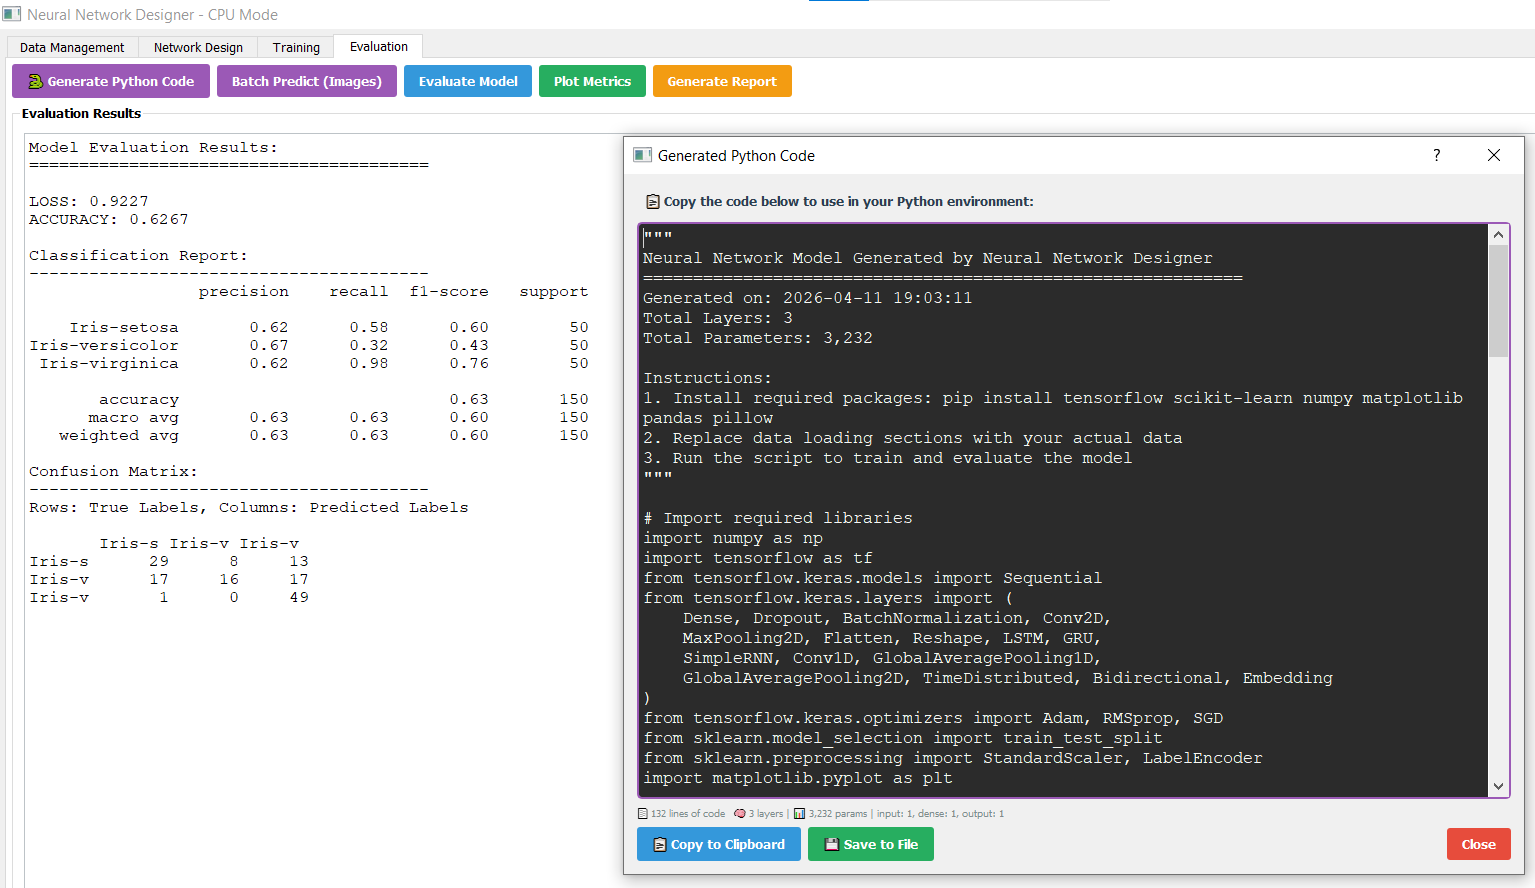
# Neural Network Model Generated by Neural Network Designer
# Generated on: 2026-04-11 19:03:11 | Total Layers: 3 | Parameters: 3,232

import numpy as np
import tensorflow as tf
from tensorflow.keras.models import Sequential
from tensorflow.keras.layers import Dense
from sklearn.model_selection import train_test_split
from sklearn.preprocessing import StandardScaler, LabelEncoder
import pandas as pd

# Load IRIS dataset (replace with actual CSV path)
df = pd.read_csv('Iris.csv')
X = df[['SepalLengthCm', 'SepalWidthCm', 'PetalLengthCm', 'PetalWidthCm']].values
y = df['Species'].values

# Preprocessing
le = LabelEncoder()
y_encoded = le.fit_transform(y)
y_cat = tf.keras.utils.to_categorical(y_encoded, num_classes=3)

scaler = StandardScaler()
X_scaled = scaler.fit_transform(X)

X_train, X_test, y_train, y_test = train_test_split(X_scaled, y_cat, test_size=0.2, random_state=42)

# Build model (exactly matching Network Designer: Input->Dense(32,relu)->Output(3,softmax))
model = Sequential([
    Dense(32, activation='relu', input_shape=(4,)),
    Dense(3, activation='softmax')
])

model.compile(optimizer=tf.keras.optimizers.Adam(learning_rate=0.0001),
              loss='categorical_crossentropy',
              metrics=['accuracy'])

history = model.fit(X_train, y_train, epochs=50, batch_size=32, validation_split=0.2, verbose=1)

# Evaluation
loss, acc = model.evaluate(X_test, y_test)
print(f"Test Accuracy: {acc:.4f}, Loss: {loss:.4f}")
✨ Happy Learning with Neural Network Designer
www.neuralnetworkdesigner.net🎓 Neural Network Designer provides an intuitive drag-and-drop interface, automated design, and full training pipeline for tabular data. The IRIS tutorial demonstrates how to go from raw CSV to a trained classifier within minutes, then export production-ready Python code.
- Auto problem detection (Classification/Regression)
- Visual network design & Auto-Design templates
- Real-time training metrics & early stopping
- Generate Python/TensorFlow code
IRIS_Classification.html | IRIS_Dat_Management.png | IRIS_Network_Design.png
IRIS_Training.png | IRIS_Training_Train.png | IRIS_Evaluation.png | IRIS_Evaluation_Python_Code.png
🔗 Download Neural Network Designer: www.neuralnetworkdesigner.net — Build powerful models without coding, then dive into Python ecosystem seamlessly.